Whether you are a seasoned equestrian or just starting out, having a level arena for riding is essential for the safety of both you and your horse. In this article, we will explain how to level a horse arena to ensure a safe and enjoyable riding experience.
Assessing the Arena
Before beginning the process of leveling a horse arena, it is important to assess the existing arena first. This includes evaluating the size, shape, and existing surface condition of the arena. The overall size and shape of the arena should be determined, as this will affect how much material and effort is needed for leveling. The condition of the existing surface should also be evaluated, as this will determine the type of material needed for filling in low spots or depressions. It is important to note any existing drainage issues that may need to be addressed as part of the leveling process.
Additionally, it is important to ensure that the arena is properly laid out. This includes evaluating the width of the arena, the size of the turns, the position of the entrance, and the overall shape. These elements should be laid out in such a way that the horse and rider can have a safe and enjoyable experience in the arena.
Once the arena has been properly assessed, the next step is to determine the type of material needed for leveling. This should be based on the condition of the existing surface, as well as the type of activities that will take place in the arena. Some arenas may require sand or clay for leveling, while others may require a combination of materials. Additionally, the type of material chosen should be compatible with the existing surface. For example, if the existing surface is sand, then sand should be used for leveling.
Finally, it is important to consider the amount of time and effort that will be needed for leveling the arena. This should take into account the size of the arena and the amount of material that will be needed for the job. It is important to plan ahead in order to ensure that the arena is leveled properly and that the job is completed in a timely manner.
Evaluating the Soil
Before beginning to level a horse arena, it is important to evaluate the soil. The quality of the soil affects how easily it can be worked, and how well it will hold its shape once the arena is leveled.
| Quality | Description |
|---|---|
| Good | Rich, dark soil with good drainage and no rocks. |
| Fair | Light brown soil with some rocks, but still good drainage. |
| Poor | Heavy, clay-like soil with poor drainage and lots of rocks. |
If the soil is of good quality, it should be easy to level. If the soil is fair, more effort may be required to level the arena. Poor soil will be difficult to work and may need to be replaced before leveling can begin. If this is the case, the soil should be replaced with soil of better quality before proceeding.
Examining the Arena Site
Before you can begin the process of leveling a horse arena, you must first examine the existing site. This will help you determine the best approach for leveling the arena, as well as provide an estimate of the amount of work needed to be done.
| Area of Investigation | Details to Look For |
|---|---|
| Surface Material | Look for existing surface material, including sand, gravel, clay, or dirt. Note the thickness, composition and condition of the material. |
| Drainage | Note the existing drainage and determine whether additional drainage is necessary to protect the arena from water damage. |
| Slope | Look for any existing slopes or rises in the area, as well as any areas that may require additional grading or leveling. |
| Obstacles | Check for obstacles such as rocks, large roots, or other debris that could pose a safety hazard for riders and horses. |
| Soil Type | Identify the type of soil in the area and note whether it has good drainage and is able to support the weight of horses. |
Once you have thoroughly examined the existing arena site, you can begin to plan your leveling project. Knowing the existing conditions of the arena will help you devise the best approach for leveling the area, and ensure that the project is done properly and safely.
Preparing the Arena
Before you start, it is important to make sure that the arena is ready for leveling. This includes:
| Step | Description |
|---|---|
| 1 | Remove all debris, such as rocks, sticks, and other objects that could be a tripping hazard. |
| 2 | Fill in any holes or low spots. Make sure that the surface is even and level. |
| 3 | Loosen the soil by tilling it, if necessary. The soil should be loose and easy to work with. |
| 4 | Rake the arena to remove any clumps of dirt and even out the surface. |
Once the arena is prepared, you are ready to start leveling it.
Removing Obstacles
Removing obstacles is one of the most important steps in leveling a horse arena. Removing obstacles helps to create a more even surface, allowing the horse to move more freely and allowing the rider to have better control.
The first step in removing obstacles is to identify all areas of the arena that have large bumps, dips, or other uneven surfaces. These areas should be marked clearly so they can be easily found and addressed. It is also important to note any obstacles that may be present, such as rocks, logs, or other debris that could cause injury to the horse.
Once the obstacles have been identified, the next step is to remove them. If the obstacle is a large rock or log, it can be dug out or removed with a shovel. If the obstacle is a dip or bump, it can be filled in with sand or soil. It is also important to remove any roots or other vegetation that may be present, as these can also cause uneven surfaces.
Once all obstacles have been removed, the next step is to level the area. This can be done by using a level or a laser level to make sure the surface is even. If necessary, additional soil or sand can be added to create a more even surface.
Finally, once the area has been leveled, it is important to compact the surface. This can be done using a roller or a plate compactor. This will help to create a more durable surface that is less likely to cause injury to the horse.
By removing obstacles and leveling the arena, riders will be able to enjoy a safer and more comfortable riding experience.
Leveling the Arena
A level surface is essential for horse safety and performance in an arena. To ensure that the arena is level, you will need to prepare the surface correctly.
Steps for Leveling the Arena
| Step | Process |
|---|---|
| 1 | Use a laser or transit to mark the high and low points on the surface. |
| 2 | Using a rake and soil, remove the high spots and fill in the low spots to create a level surface. |
| 3 | Continue to rake and soil until the surface is level. |
| 4 | Compact the soil to ensure a firm surface. |
| 5 | Use a laser or transit to recheck the surface to confirm it is level. |
Leveling the arena is an important part of creating a safe and suitable surface for horse riding. It is important to use the right tools and take the time to create a level surface. Once the arena is level, it is important to maintain it with regular grooming, watering, and other maintenance requirements.
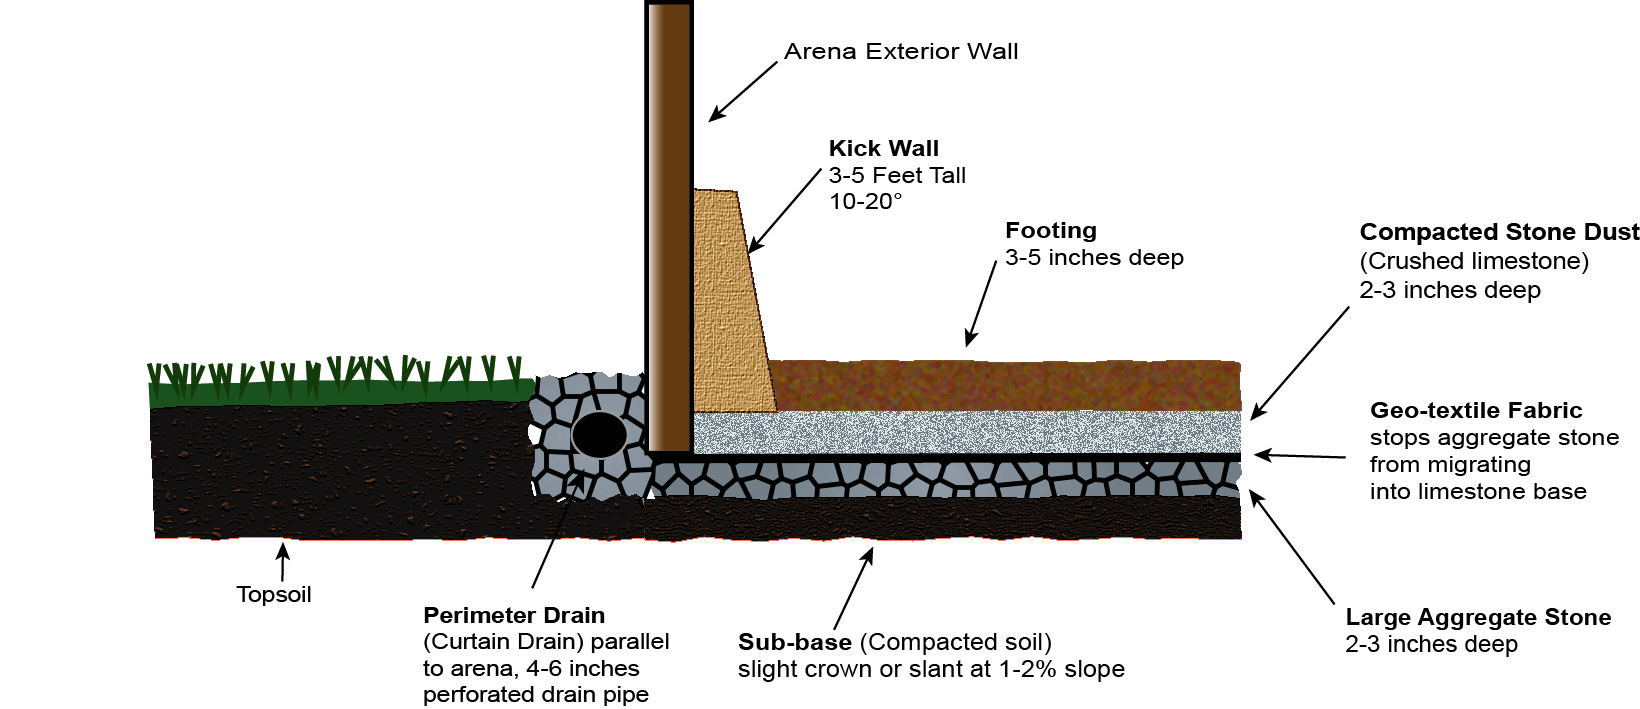
Adding Sand, Gravel, and Topsoil
To create a safe and level riding surface, you will need to add sand, gravel, and topsoil to your horse arena:
- Sand: Sand helps to even out the riding surface, allowing for more even footing for the horses. Sand is typically applied at a depth of 1-2 inches.
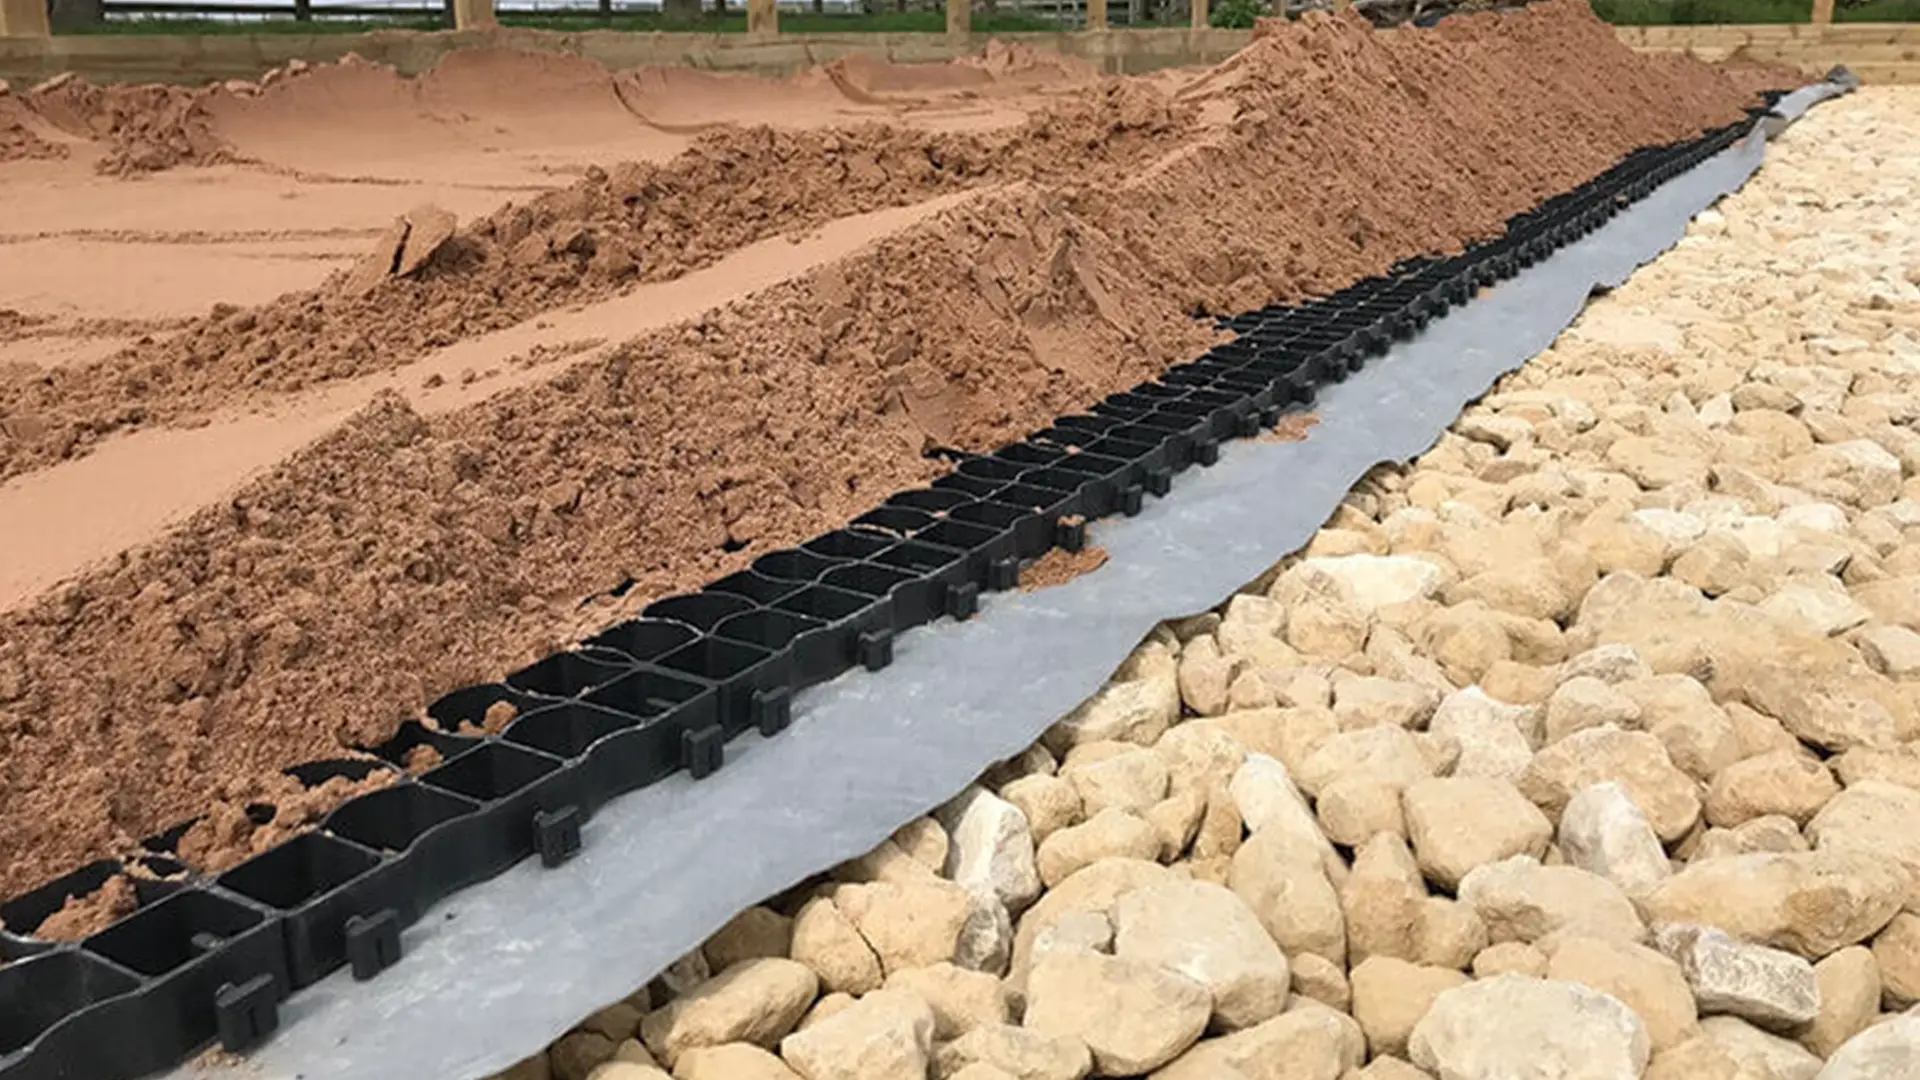
- Gravel: Gravel provides drainage, allowing for water to percolate through the surface and away from the arena. Gravel should be applied at a depth of 4-6 inches in order to provide adequate drainage.
- Topsoil: Topsoil helps to bind the sand and gravel together, making it easier to move around and providing a more comfortable surface for the horses. Topsoil should be applied at a depth of 2-3 inches.
Before adding the materials to your arena, it is important to prepare the surface. This includes tilling the soil, removing any debris or stones, and grading the ground to ensure that it is even and level. Once the surface is properly prepared, you can begin to add the materials.
Start by spreading the sand over the surface. Use a rake to even out the surface and ensure that the sand is spread evenly. Next, spread the gravel over the surface. Again, use a rake to evenly spread the gravel and ensure that it is level. Finally, spread the topsoil over the surface. Once the topsoil is spread, you can use a roller to further even out the surface and ensure that the materials are properly packed in.
Once you have added the sand, gravel, and topsoil, you can begin to level the surface. Use a rake or a leveling board to even out the surface and remove any bumps or divots. Make sure to check the surface regularly and adjust as necessary.
By adding sand, gravel, and topsoil to your horse arena, you can ensure a safe and level riding surface that is comfortable for both horse and rider.
Applying the Sand
- Make sure you have enough sand to cover the entire arena.
- Spread the sand evenly and use a rake to level it out.
- Use a roller or drag to compact the sand.
- Rake the sand again to level it out and remove any bumps or hollows.
- Repeat the process until the arena is level and the sand is evenly distributed.
- Make sure to check the sand depth throughout the arena to ensure it is the same.
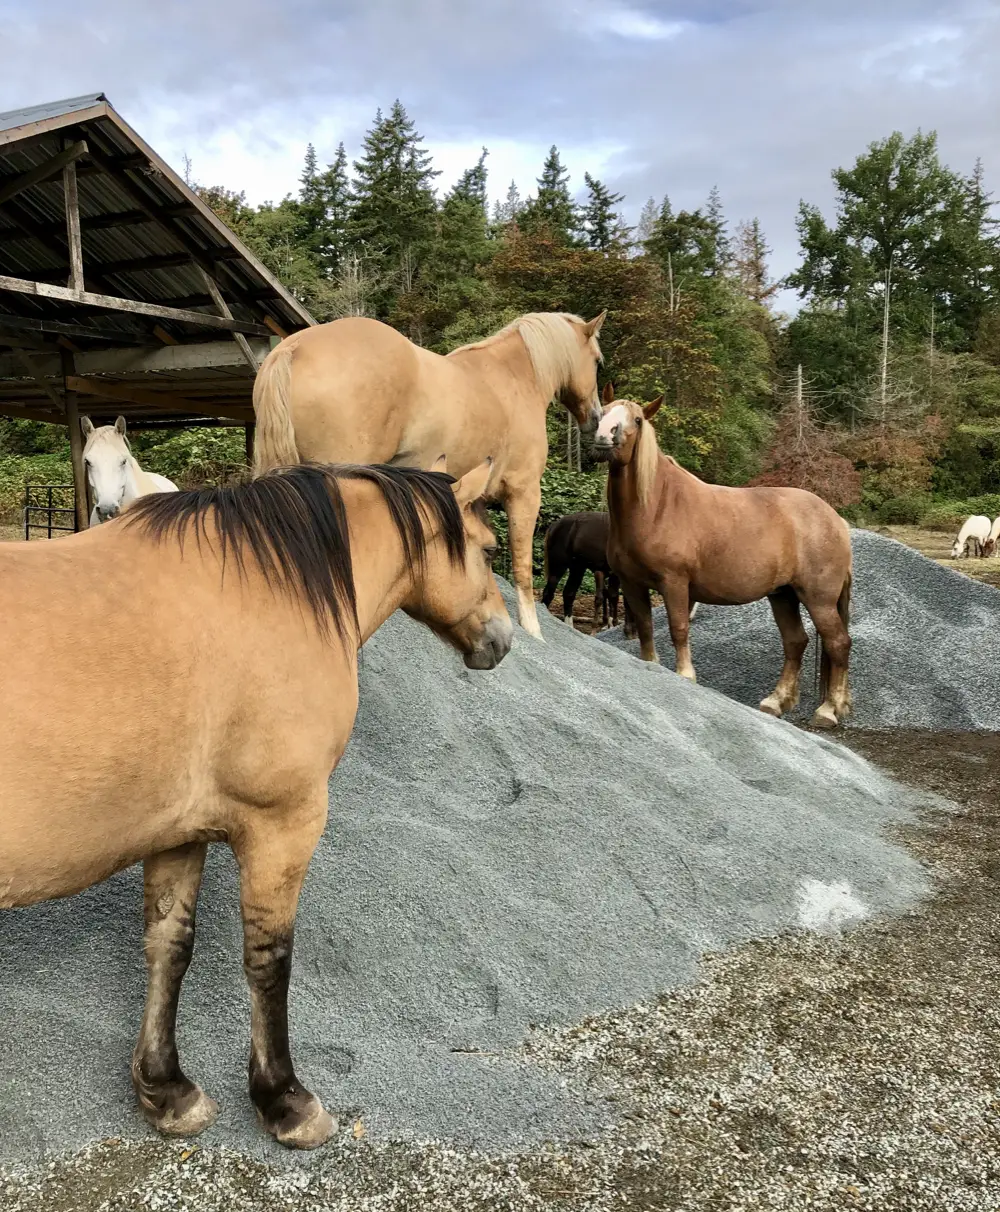
Adding the Gravel
Once you have finished constructing the walls and floor of your arena, the next step is to add the gravel. It is important to use the right type of gravel for your arena, as the wrong type can lead to drainage problems or an unstable riding surface.
When it comes to choosing the type of gravel, it is best to consult with a professional who can advise you on the best option for your particular situation. Generally speaking, well-graded gravel is the best choice for arena floors, as it provides good drainage and a stable riding surface.
Once you have chosen the type of gravel to use in your arena, you can begin adding it. Generally, you should aim for a layer of gravel that is 6-8 inches deep. The gravel should be spread evenly across the whole arena and should be leveled with a rake. You can also use a tractor or bulldozer to help spread the gravel evenly.
After you have added the gravel and leveled it, it is important to roll it. This can be done using a lawn roller or a heavy roller. Rolling the gravel will help to create a smooth and even surface.
Once the rolling is finished, you can begin to add additional materials such as sand and rubber. These materials will help to create a softer and more cushioned riding surface. Again, it is best to consult with a professional to determine the best type of materials for your particular arena.
Once you have added the gravel, sand, and additional materials, it is time to groom the arena. This involves raking the surface and removing any debris or large stones. After grooming, you can then add additional layers of sand and rubber to further improve the riding surface.
By following these simple steps, you can ensure that your horse arena is leveled and ready for use. It is important to take your time and be sure to use the right materials in order to create a safe and comfortable riding surface.
Adding the Topsoil

Once the base layer of the arena has been built and leveled, it is time to add the topsoil. Topsoil is a layer of soil that is added to the arena for the purpose of providing a soft and level surface for the horses to ride on. The topsoil should be evenly spread over the entire surface of the arena and should be at least 4 inches thick. It is important to use quality topsoil that is free of rocks, roots, and other debris.
Begin by spreading the topsoil over the surface of the arena. Use a rake to even out the topsoil and make sure that it is level. After the topsoil has been spread, use a water hose to lightly dampen it. This will help ensure that the topsoil is packed down and that it stays in place. Once the topsoil has been dampened, use a roller to pack it down. This will help create a firm and level surface.
Finally, use a rake to make sure that the topsoil is even and level. Make sure to rake away any low spots and fill in any high spots. This will help create a flat and even surface for the horses to ride on. Once the topsoil has been leveled, the arena is ready for use.
Compact the Arena
- Remove any debris, rocks and other obstacles from the arena.
- Use a tractor, a disc harrow and a roller to level the arena.
- Start by discing the entire arena first.
- Disc up and down, left and right to create an even surface.
- Once the arena is disc-ed, use the roller to break up any clumps of dirt and to flatten the arena.
- Roll up and down, left and right to create an even surface.
- Repeat the process of discing and rolling until the arena is level.
- Make sure to compact the arena after each discing and rolling.
- To compact the arena, use a tractor with a weight box, a water truck or a vibratory roller.
- Compact the arena on a regular basis to keep it level and in good condition.
Adding Filler and Finishing Touches
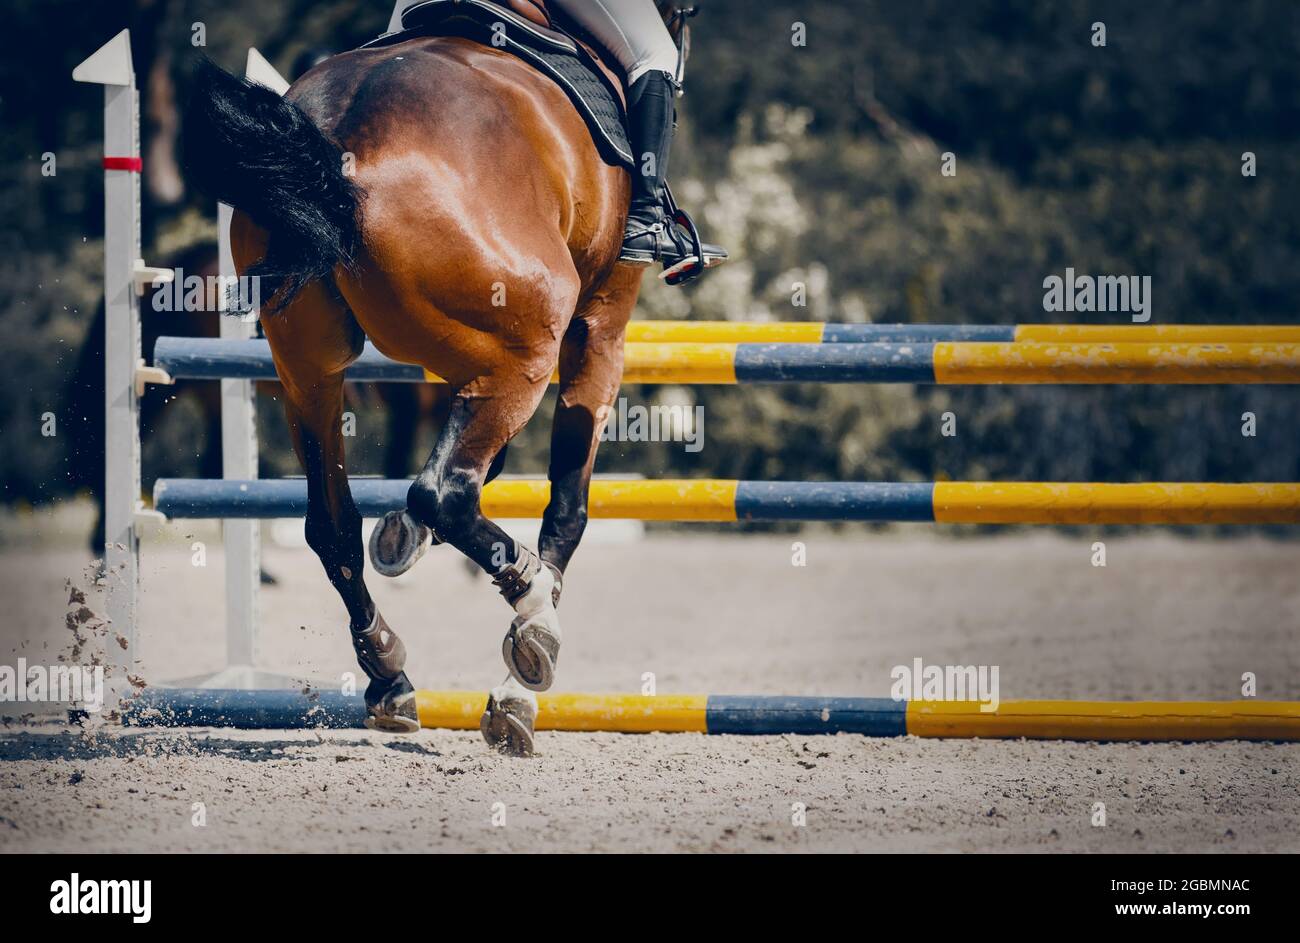
Once the horse arena is leveled, you can begin adding filler and making final adjustments to the surface. Filler helps to maintain a level surface and absorb impact, which is especially important in horse arenas used for high-impact activities such as jumping or dressage.
Types of Filler
The type of filler you select will depend on the type of surface you are working with. Common fillers for outdoor arenas include:
| Filler Type | Description |
|---|---|
| Sand | Sand helps to absorb impact and make the surface more even. It should be used in combination with other materials such as stone dust. |
| Stone Dust | Stone dust helps to bind the sand and soil together, preventing them from becoming too loose or uneven. |
| Wood Chips | Wood chips can be used as a filler in some arenas. They help to absorb impact and keep the surface level. |
Adding Filler
Once you have selected the type of filler you want to use, you can begin adding it to the surface. Start by spreading a thin layer of filler across the entire surface. Use a rake to spread the filler evenly and level out any bumps or dips.
Once the filler has been spread, use a roller to compact it into the surface. This will help to make the surface more even and durable.
Finishing Touches
Once the filler has been added and the surface is level, it is time to make the final adjustments.
Start by installing edging around the perimeter of the arena. This will help to keep the surface from becoming too loose or uneven.
Next, add any additional features such as jumps, poles, or dressage letters. Make sure to position them properly and secure them firmly in the ground.
Finally, check the surface for any low spots or bumps and make any necessary adjustments. Once the surface is even and all features are securely in place, your horse arena is ready for use.
Adding the Filler

- Rake the arena surface to remove any large debris, then dampen the arena with a light misting from a garden hose.
- Spread the filler material over the arena surface, using a wheelbarrow or spreader for larger areas.
- Move the wheelbarrow or spreader over the arena in a back-and-forth pattern, making sure to spread the filler evenly.
- Rake the arena surface with a metal rake to evenly distribute the filler.
- Spread another layer of the filler material, if necessary. This will help to ensure an even surface.
- Water the arena lightly with a garden hose or sprinkler to help settle the filler material into the arena surface.
- Allow the arena surface to dry before continuing.
Finishing Touches
Once the arena is leveled, the next step is to give it the finishing touches. This includes adding the footing material, such as sand, and smoothing it out. Here is a step-by-step guide to finish up the arena:
| Step | Instructions |
|---|---|
| 1 | Rake the arena to remove any imperfections and create a smooth surface. |
| 2 | Spread the footing material evenly over the entire surface of the arena. |
| 3 | Rake the footing material to level it off and remove any large clumps. |
| 4 | Water the footing material to help it settle and create a more even surface. |
| 5 | Smooth out the footing material with a drag or harrow. |
| 6 | Check the footing material to make sure it is level and even. |
| 7 | Mark off the arena with jumps, poles, and other obstacles. |
| 8 | Make sure any jumps and poles are securely set in the footing. |
| 9 | Check the arena for any imperfections or hazards and make any necessary repairs. |
| 10 | Enjoy your new, leveled horse arena! |
Once all of these steps are completed, you should have a leveled, safe, and enjoyable horse arena to ride in.
Managing the Arena
- Check the arena regularly for any signs of wear and tear.
- Inspect the arena surface for any signs of rutting, erosion or puddles.
- Check the drainage system to ensure that it is working properly.
- Ensure that the arena is being used in accordance with the manufacturer’s instructions.
- If necessary, add additional material to the surface to maintain the desired depth.
- Regularly rake the surface to ensure that it is even and free of debris.
- Ensure that the arena is free from any foreign material such as stones or sticks.
- Check the arena for any signs of damage or deterioration such as cracking or splitting.
- Regularly check the arena fence to ensure that it is in good condition.
- Clean the arena regularly to remove any debris or dirt.
- Check the arena for any signs of pests or other unwanted visitors.
- Ensure that the arena is well lit at night for safety reasons.
- Ensure that the arena is adequately ventilated.
Frequently Asked Questions
1. How Much Material is Needed to Level a Horse Arena?
Leveling a horse arena requires several materials, depending on the size and type of arena. In order to ensure a safe, comfortable riding surface, it is important to use the right amount of materials.
- Sand: Sand is typically used as the primary base material for arenas and should be spread in a 4-6 inch layer. The amount of sand required will depend on the size of the arena, but generally speaking, you will need between 20-30 tons of sand.
- Compost: Compost is used to help bind the sand and create a smoother, more even surface. It should be spread in a thin 1-2 inch layer. The amount of compost needed for an arena will vary depending on the size, but generally speaking, you will need between 3-5 tons.
- Gravel: Gravel is used to help with drainage and should be spread in a thin 1-2 inch layer. The amount of gravel needed for an arena will vary depending on size, but generally speaking, you will need between 10-15 tons.
It is important to use the right ratio of materials in order to create a safe and comfortable riding surface. The exact ratio will depend on the size and type of arena, so it is important to consult with an expert to ensure that you are using the right amount of materials.
2. What type of soil is best for grading a horse arena?
When it comes to leveling a horse arena, the type of soil you use is of utmost importance. Different soils have different characteristics that can make them suitable for different purposes. Here are the best soil types for grading a horse arena:
- Sandy loam: Sandy loam is one of the best soils for horse arenas. It is a combination of sand and clay particles, making it ideal for providing cushioning and support. It also won’t compact easily, so it won’t compact down and cause any issues down the line.
- Clay loam: Clay loam is similar to sandy loam, but it is heavier and has more clay particles. It is best for arenas that require a firmer base and more stability.
- Coarse sand: Coarse sand is an ideal soil type for horse arenas because it is very free draining and provides cushioning. The only downside is that it can be difficult to work with, due to its coarse nature.
- Gravel: Gravel can be used to level a horse arena, but it is not the ideal material. It is best used as a top dressing and should not be used as the primary material for grading.
When selecting a soil for your horse arena, it is important to take into consideration the type of arena you are creating and the desired characteristics of the soil. With the right soil type, you can ensure your horse arena is level and safe for use.
3. What is the correct depth for a horse arena?
The correct depth for a horse arena will depend on the type of surface material used. Generally speaking, the deeper the arena, the more cushioning and better footing it will provide for the horse.
- For arenas with sand, clay, or dirt surface, the correct depth is 8-12 inches.
- For arenas with rubber mats, the correct depth is 4-6 inches.
- For arenas with synthetic fiber surfaces, the correct depth is 4-6 inches.
- For arenas with rubber-infused sand, the correct depth is 8-12 inches.
It is important to remember that the depth of the arena is not the only factor that affects the footing. The type and quality of the surface material is also important. For example, a deeper arena with a low-quality surface material may not provide the same cushioning and footing as a shallower arena with a higher-quality surface material.
When selecting a surface material, it is important to consider the type of activity the arena will be used for, the amount of wear and tear on the surface, and the climate in which the arena will be used. Taking all of these factors into consideration will help ensure that the correct depth of the arena is selected for your horse’s safety and comfort.
4. What safety considerations should be made when leveling a horse arena?
When leveling a horse arena, safety must always be the number one priority. Here are some safety considerations to keep in mind:
- Ensure that the arena surface is even throughout the entire area, including the edges, to avoid any tripping or slipping hazards.
- Check for any uneven spots, ruts, or large rocks that could cause injury to horses or riders.
- Ensure that the arena is free from any debris that could cause potential harm.
- Check for any potential drainage issues that could cause standing water.
- Check for any sharp edges or other potential hazards.
- Ensure that the arena is clearly marked to avoid any confusion.
- Ensure that the arena is well lit to avoid any potential falls or injuries.
- Ensure that the arena is properly fenced and secure to avoid any potential escapees.
5. What is the best way to ensure a smooth surface for a horse arena?
A smooth surface for a horse arena is essential for providing safe and comfortable riding for horses. To ensure this, there are several steps that should be taken:
- Start with a level base. Before you begin to level the arena, it is important to make sure that the base is level. This can be done using a laser level or a carpenter’s level.
- Remove any debris or obstacles. It is important to make sure that the surface of the arena is clear of any debris or obstacles. This will ensure that the surface is even and safe for the horses.
- Add a layer of sand. Once the area has been cleared, a layer of sand should be spread over the entire surface of the arena. This will provide a level and even surface for the horses to ride on.
- Add a layer of footing. Depending on the surface, a layer of footing such as rubber, wood chips, or sawdust can be added over the sand. This will help to provide a softer surface for the horses to ride on.
- Compact the surface. After the footing has been added, it is important to compact the surface. This can be done using a tractor or a hand-held compactor. This will ensure that the surface is even and free of any bumps or dips.
Following these steps will help to ensure that the surface of the arena is smooth and even, providing a safe and comfortable riding experience for the horses.
Conclusion
The goal of leveling a horse arena is to create a safe and comfortable environment for riding and training. It is a time-consuming process, but with some careful preparation, the process can be completed in a few short days. The most important thing to remember is to start with a level surface and use a level to ensure that the edges are even. Once the arena is leveled, the final touches such as adding footing material, edging, and surface drainage can be completed. With a leveled arena, the rider can now enjoy a safe and enjoyable riding experience.
References
- Lang, E. & DeRuiter, C. (2015). Grounds Maintenance: Horse Arena Maintenance. Retrieved from http://www.extension.org/pages/26521/grounds-maintenance:-horse-arena-maintenance
- McGreevy, P. (2012). Equine Science. NJ: John Wiley and Sons.
- American Association of Equine Practitioners. (2009). Maintaining Your Horse Arena. Retrieved from http://www.aaep.org/horsehealth/arena_maintenance.htm